
Goal
At Replay, we’re building a time-travel debugger for JavaScript which lets you record and replay your app. We’re currently working on recording browser tests because it’s frustrating when they fail intermittently.
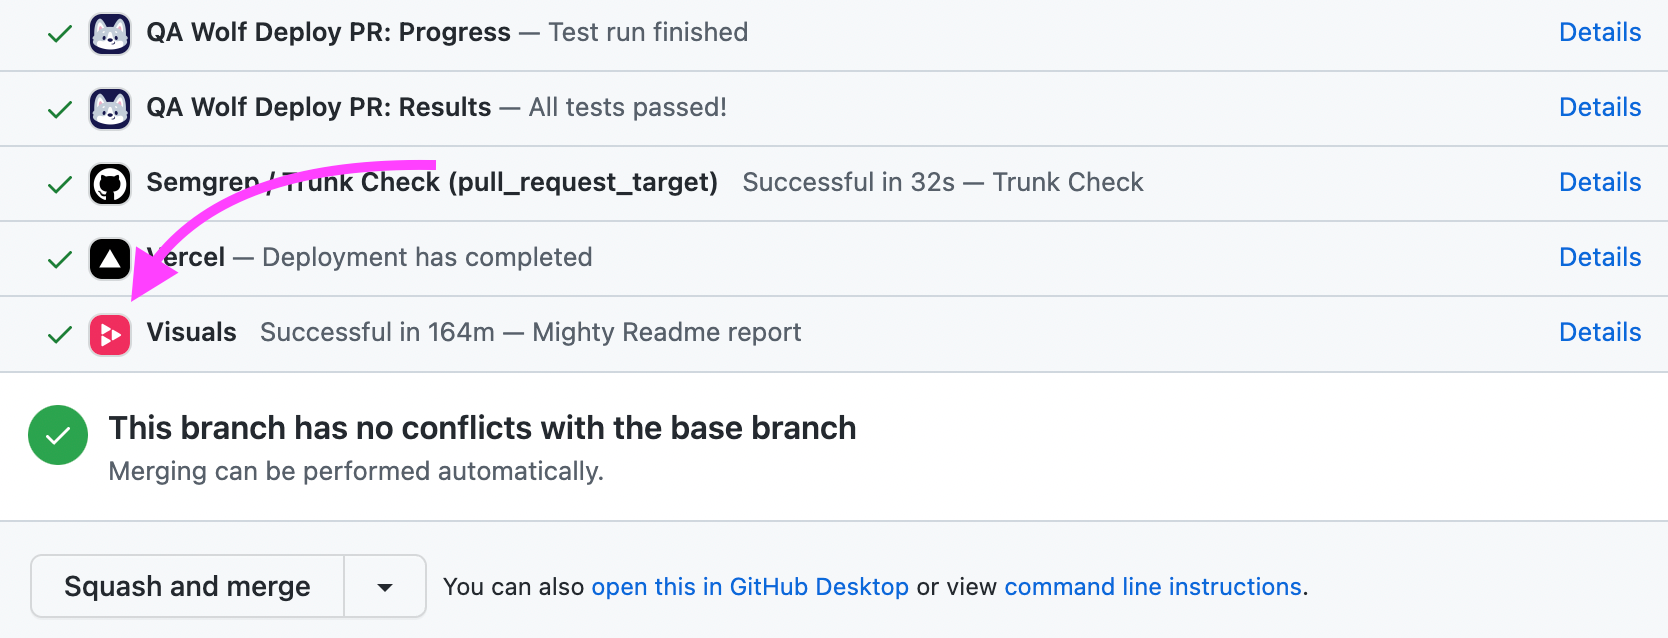
This past week, we started working on a side project we’re calling Replay Visuals. The goal is to save the snapshots taken from the browser test runs and provide a workflow for approving visual regressions.
Challenge
The Visuals app is hosted on Vercel and backed by Supabase which provides an interface for storing data in Postgres and images in their storage backend. It was fairly easily to use Vercel API functions to upload and download images. The biggest challenge was teaching the Visuals app how to create and update a GitHub check run.
The first thing that I missed was that Check Runs can only be managed via GitHub Apps. This means that personal tokens (either classic or fine grained) will not work. This is probably okay in the long run because we want to build Visuals in a generalizable way so that it can be used by others and at that point, it’ll be nice if users can install the GitHub App and the updates don’t nominally come from my account 🙂
Once we realized that we would be using a GitHub App, the problem basically boiled down to how best to follow this doc which outlines the steps.
- Create an App
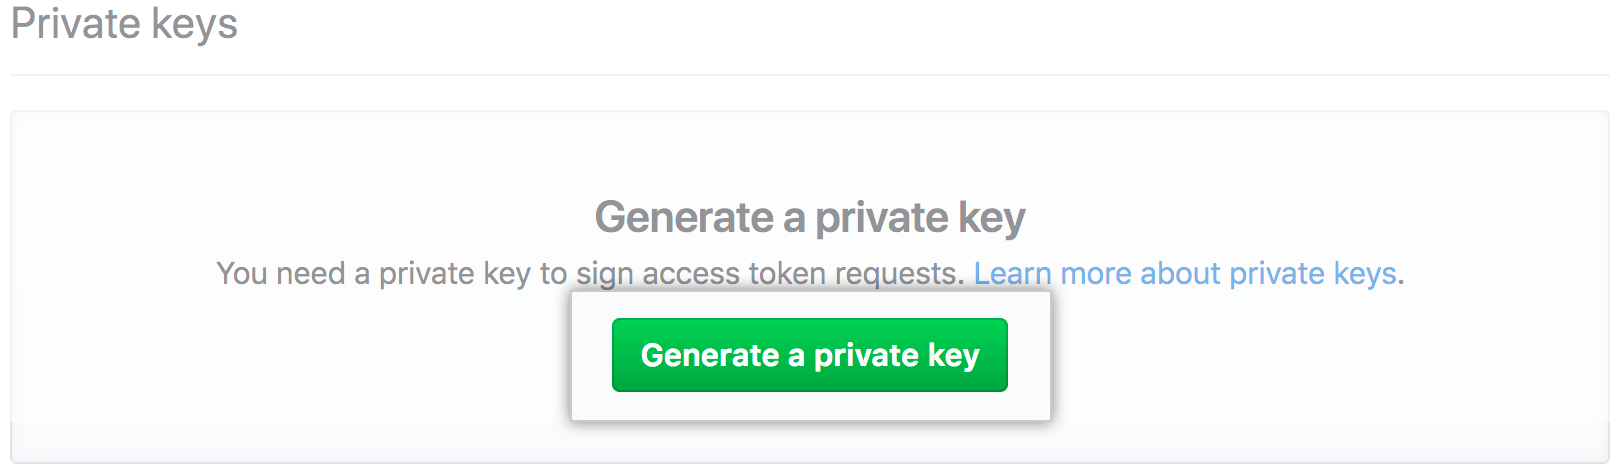
- Create a private key
- Install the App
- Create a JWT with a reasonable expiration and app id
- Use the JWT and the installation id to create a token
- Use the token to create the Check Run
- profit
Here is how it looks
Step 1: Main Function
The main function takes an
application id, installation id, and private key. Don’t worry after publishing this Replay, we changed the private key 😉. Down the road we’ll modify this function to take the installation id as a parameter so that Visuals works for other repos. The main function will first call
createJWT and then pass the jwt into the createToken function and return the new token.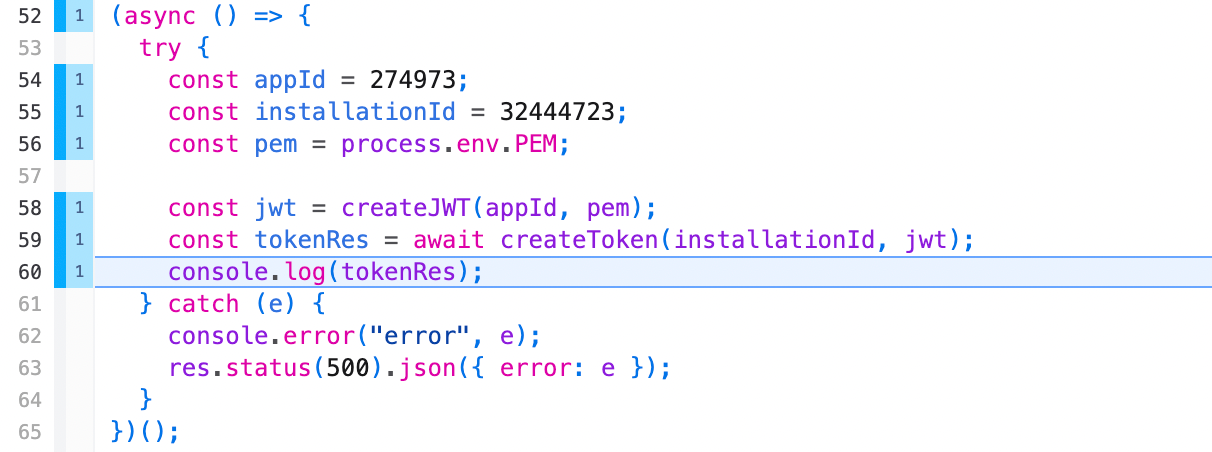
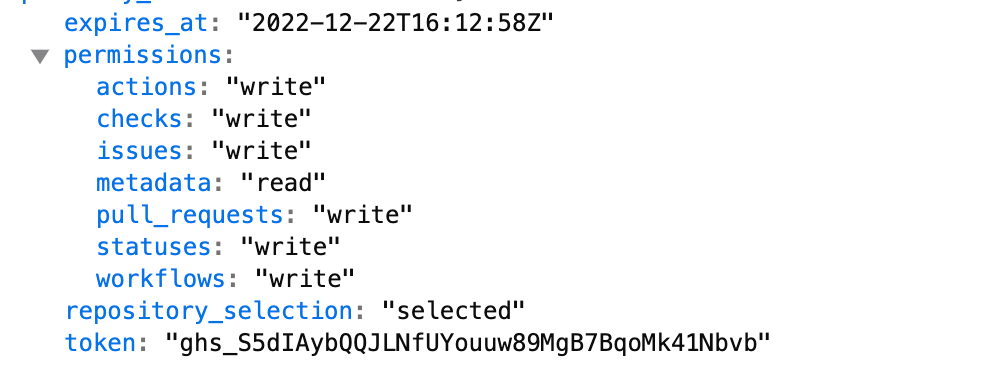
Here’s what the token response looks like. We get permissions and and expiration date, but the main thing we want is the
token which we’ll use to create the Check Run.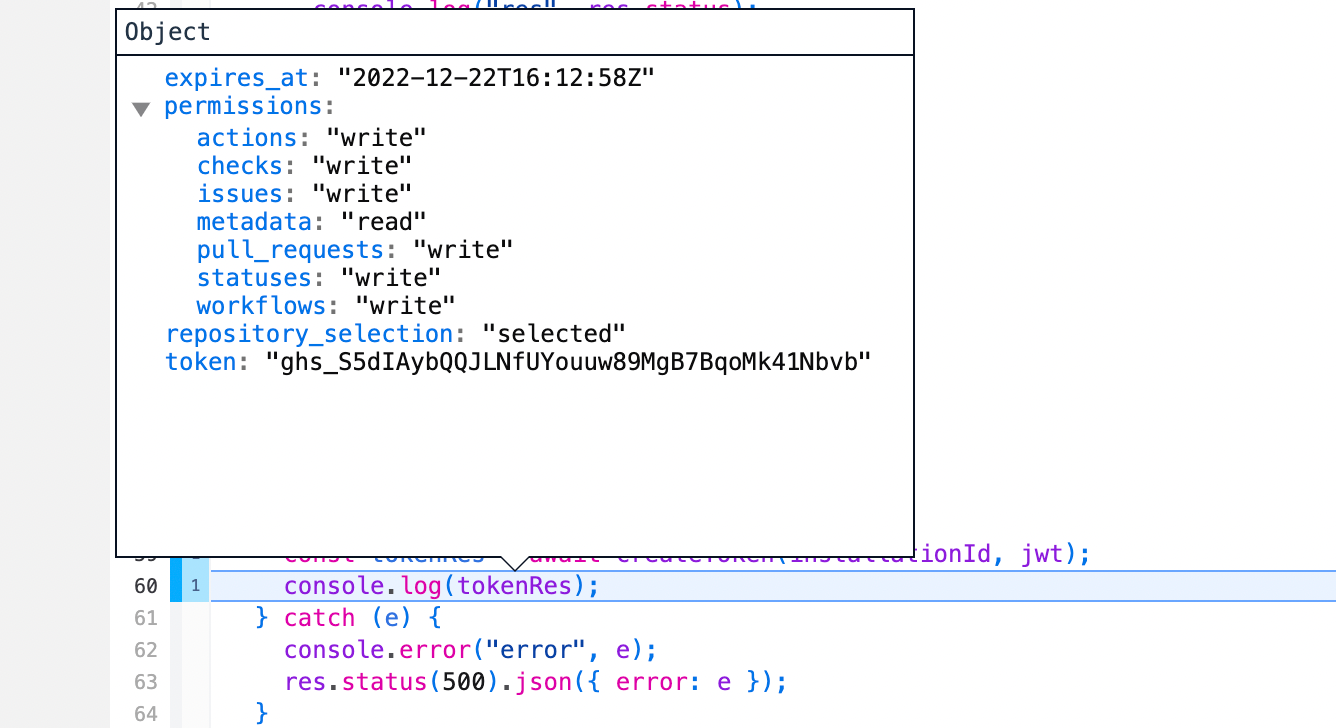
Step 2: Creating a JWT
createJWT is actually pretty simple. We used the jsonwebtoken library to sign the JWT which is similar to the ruby gem which the docs provided. 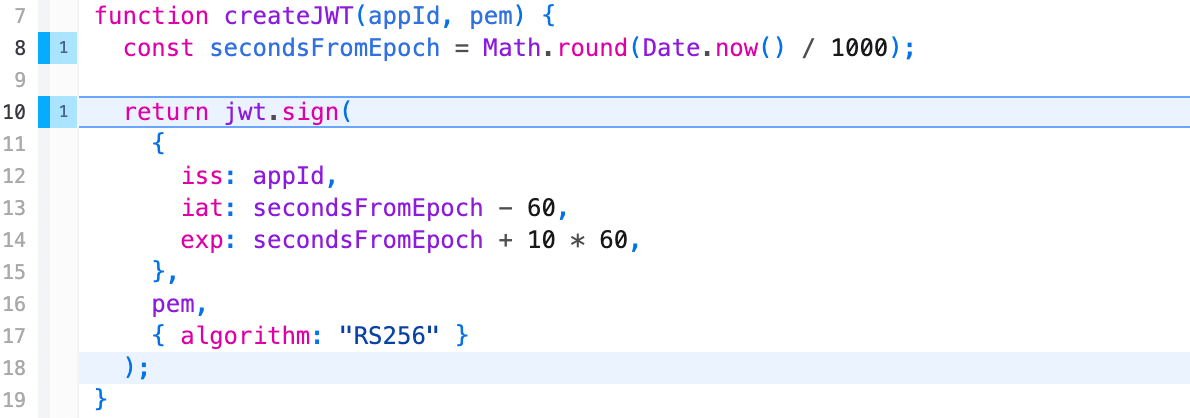
The hardest part was getting the
secondsFromEpoch to be correct. Here I wish I trusted CoPilot to write it because once i came up with this variable name, CoPilot got it the first time, but when I first tried. I thought Date.now() was seconds because it returned a number 🙂 I didn’t realize it was ms. We debugged this by running the ruby script the doc had and when it worked and our JS function failed, comparing the iat value which was basically seconds - 60. That’s how we foundout we had milliseconds. The second bug was realizing we had decimals which is where the Math.round came from.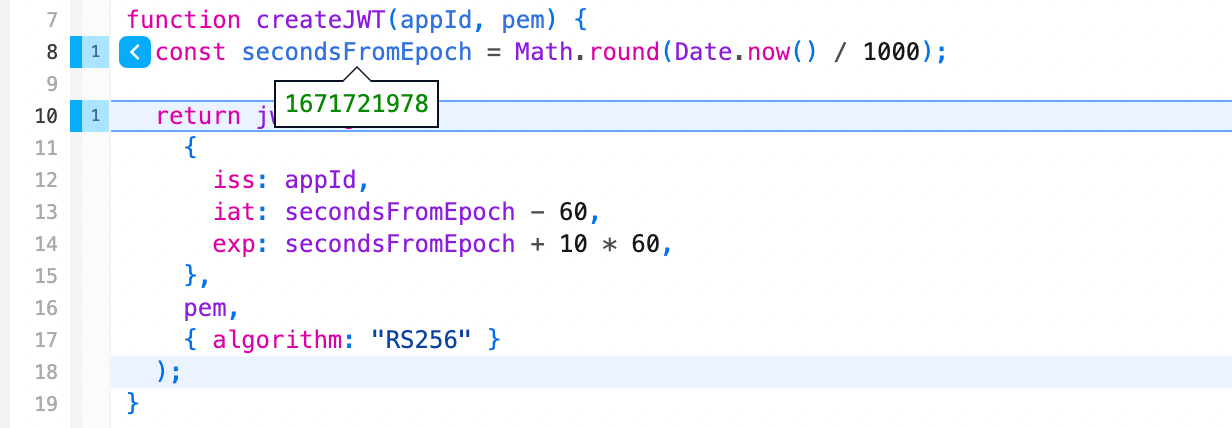
Another gotcha which is not covered in the docs is this
10 which is supposed to set the expiration 10 minutes in the future. 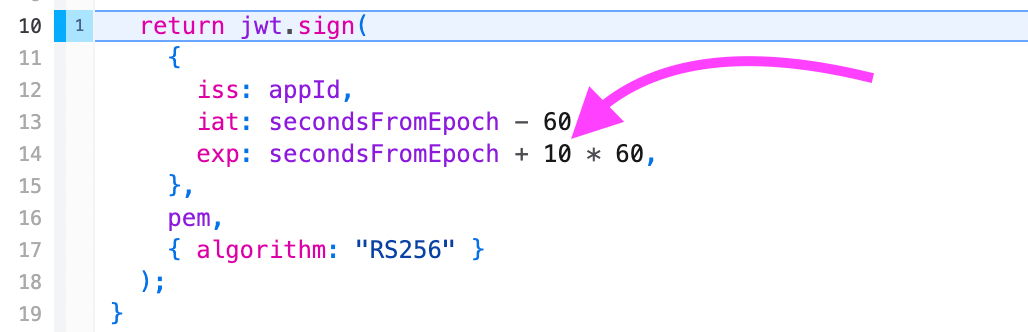
While that’s technically alright, it does a funny race condition because I imagine you cannot set an expiration 10 minutes and 1 second in the future where sometimes you’ll see this error.
json{
  "message":"'Expiration time' claim ('exp') is too far in the future",
  "documentation_url":"https://docs.github.com/rest"
}
We went with setting the expiration date 9 minutes in the future and stopped seeing the error.
While we’re not going to get distracted here, I highly recommend stepping into the
jwt.sign call in the replay and seeing how JWTs works. There’s a lot of boiler plate, but it boils down to some RSA algorithms that are used to sign strings with a key. Personally, Replay is most magical for me when it helps me understand scary concepts 😄 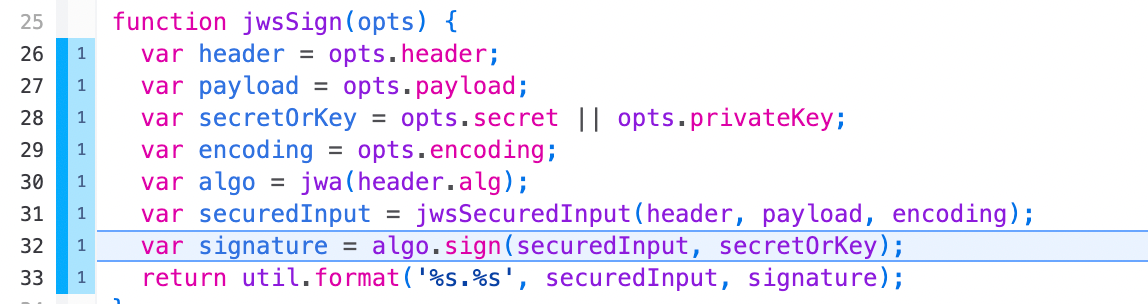
Step 3: Creating a token
The next is to pass the
jwt into createToken and ask GitHub to give us a token we can use to create the Check Run. GitHub conveniently has an access_token endpoint for this that takes the JWT and installation ID and returns the token. You’ll want to be careful to use the “Bearer “ prefix for the JWT and pass along the Accept header as well.
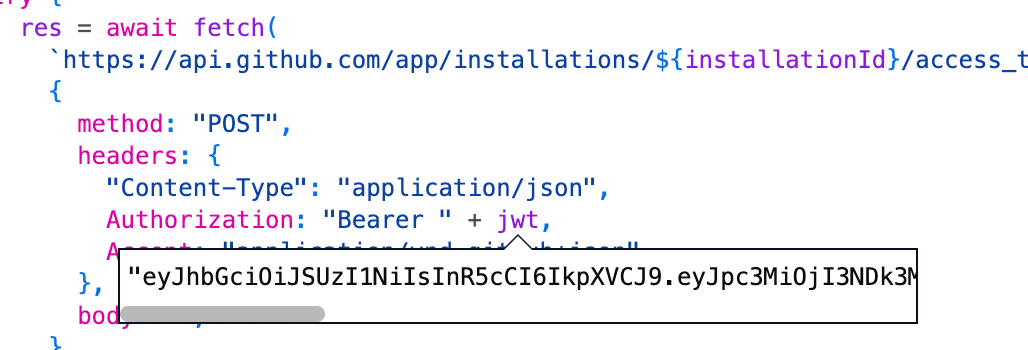
Once it’s successful, you’ll get a response with a status code
201. It’s not obvious why it’s not 200 , but hey there are weirder things.
The response value will include the expiration, permissions, and the token which is what we’re really after.
Conclusion
GitHub provides an Octokit library which has a set of strategies for authenticating. There are probably idiomatic ways to do this that we should be using. What we found though was that trying to use the Octokit library made debugging the problem harder. Instead of trying to break the problem down into smaller bits and sequentially getting them to work, we kept reaching for other strategies or trying the same thing over and over again. There’s probably an opportunity for Octokit to make getting setup easier by recognizing common problems and improving the error messages and adding troubleshooting docs.